Your First MCP Server
Understand and Configure Your MCP Server
Section titled “Understand and Configure Your MCP Server”In this guide, you will explore the MCP Server details page in the Infragate Console. This page is where you can monitor, update, and configure your MCP server once it has been deployed.
You will learn how to read the server’s status, understand its configuration fields, manage tools and integrations, and apply updates safely.
-
Navigate to your MCP Server
Section titled “Navigate to your MCP Server”From the Infragate Console, open the sidebar and click MCP Servers. Then select one of your deployed servers from the list.
You’ll land on the Overview tab - the central hub for your server’s status and configuration.
-
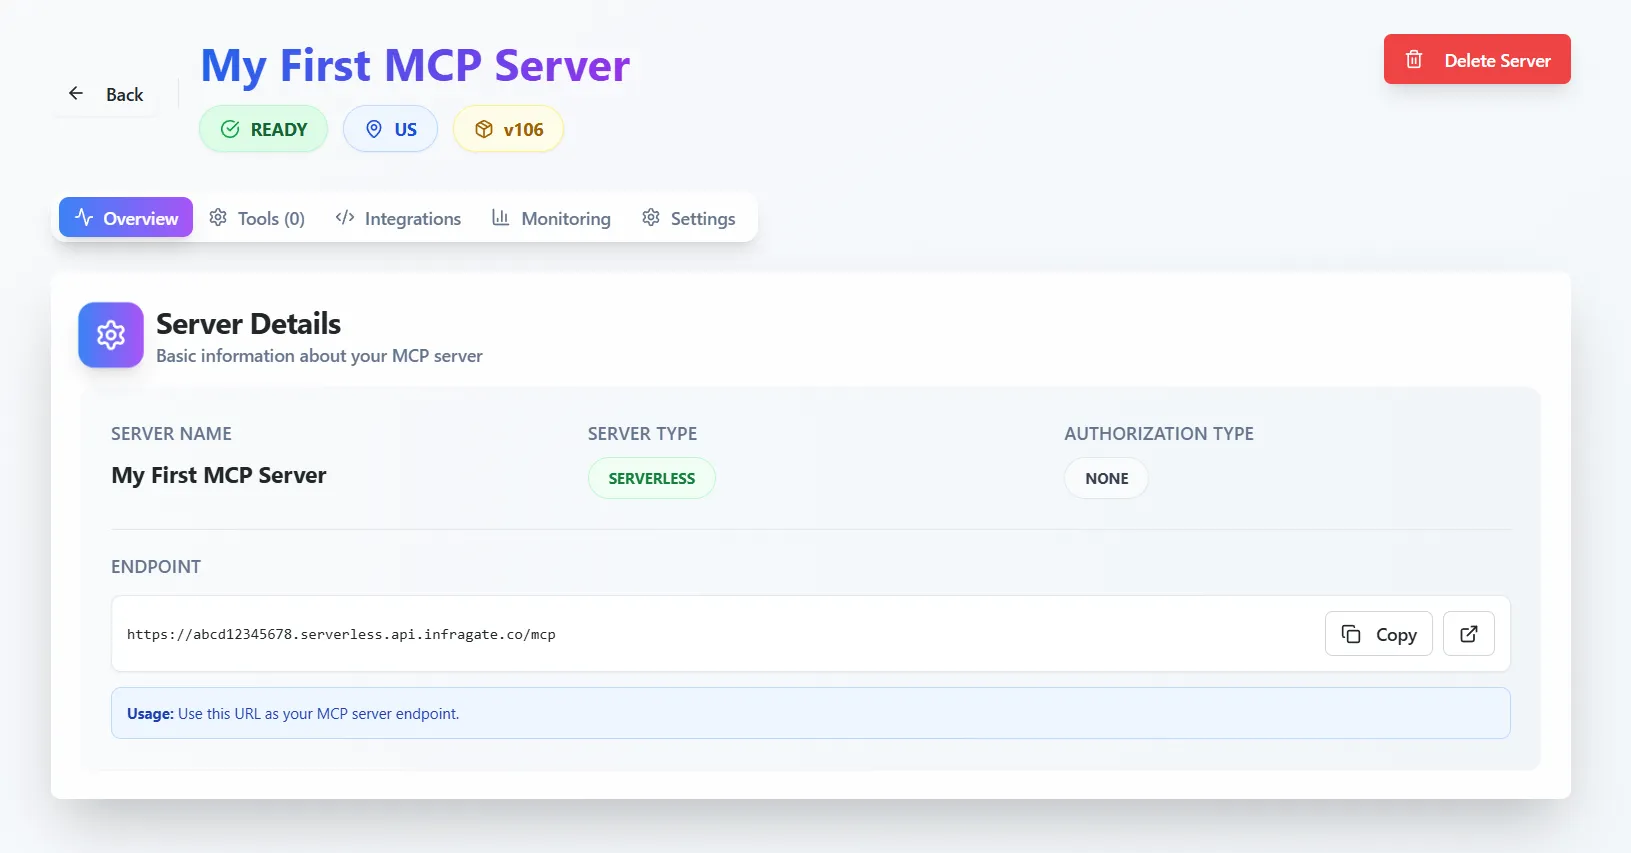
Review Server Details
Section titled “Review Server Details”The Server Details section provides metadata and connectivity info.
- Server Name – A descriptive name for easy identification. You can rename it anytime in Settings.
- Server Type – Indicates if your server is
Serverlessor a dedicated instance. - Authorization Type – Defines how clients authenticate (
None,API Key,Bearer Passthrough). Learn more about authorization modes. - Endpoint – The base URL used by your MCP client.
-
Manage Versions and Updates
Section titled “Manage Versions and Updates”When a yellow banner labeled Update Available appears, a new runtime or configuration update can be applied.
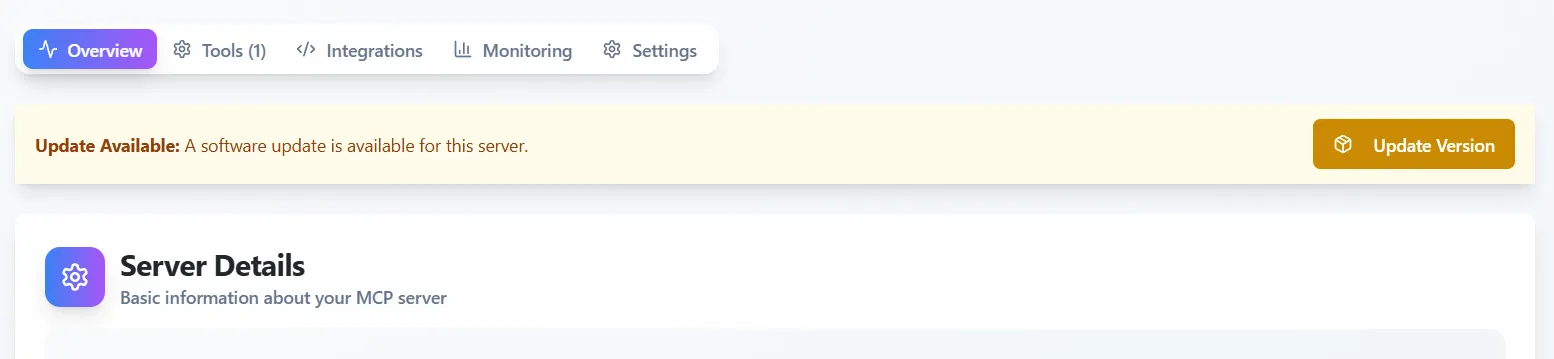
To apply the update:
- Click Update Version.
- Wait until the server status changes back to
READY.
Server updates do not impose any downtime, but there may be a brief period where new requests are delayed while the update is applied.
-
Explore the Navigation Tabs
Section titled “Explore the Navigation Tabs”The top navigation bar provides access to multiple configuration areas:
- Overview – Displays basic information and endpoint configuration.
- Tools – Manage the tools registered on your MCP Server.
- API Keys – Create and manage API keys for client authentication. Only available when Authorization Type is set to
API KeyorBearer Passthrough. - Integrations – Quick setup snippets allowing the integration with existing MCP clients.
- Monitoring – View metrics, logs, and performance charts.
- Settings – Control naming and authorization.
Each tab focuses on a specific aspect of managing your MCP Server.
-
Configure Tools
Section titled “Configure Tools”Navigate to the Tools tab to view or add functions your server can execute.
- Click Add Tool to define a new MCP tool.
- Provide a name, description
- Choose the tool type (e.g.,
Database,HTTP API,Custom Function) - Define input parameters.
- Map your input parameters to data sources or function arguments.
-
Connect Integrations
Section titled “Connect Integrations”The integrations tab exposes a set of ready-to-use code snippets for popular MCP clients. Use these snippets to quickly connect to your server in your MCP client of choice.
-
Monitor Performance
Section titled “Monitor Performance”Open the Monitoring tab to inspect live metrics and logs.
- Metrics: Number of requests and average latency.
- Logs: filter logs by date, tool, or data source.
- Billing Usage: Track the daily spend of your server.
-
Adjust Settings and Permissions
Section titled “Adjust Settings and Permissions”In the Settings tab you can:
- Rename your server.
- Change authorization type.
- Delete your server if no longer needed.
-
Connecting Your MCP Client
Section titled “Connecting Your MCP Client”Once your server is configured:
- Confirm it shows a
READYstatus. - Copy the endpoint.
- Test it with MCP Inspector or your preferred MCP client.
- Confirm it shows a